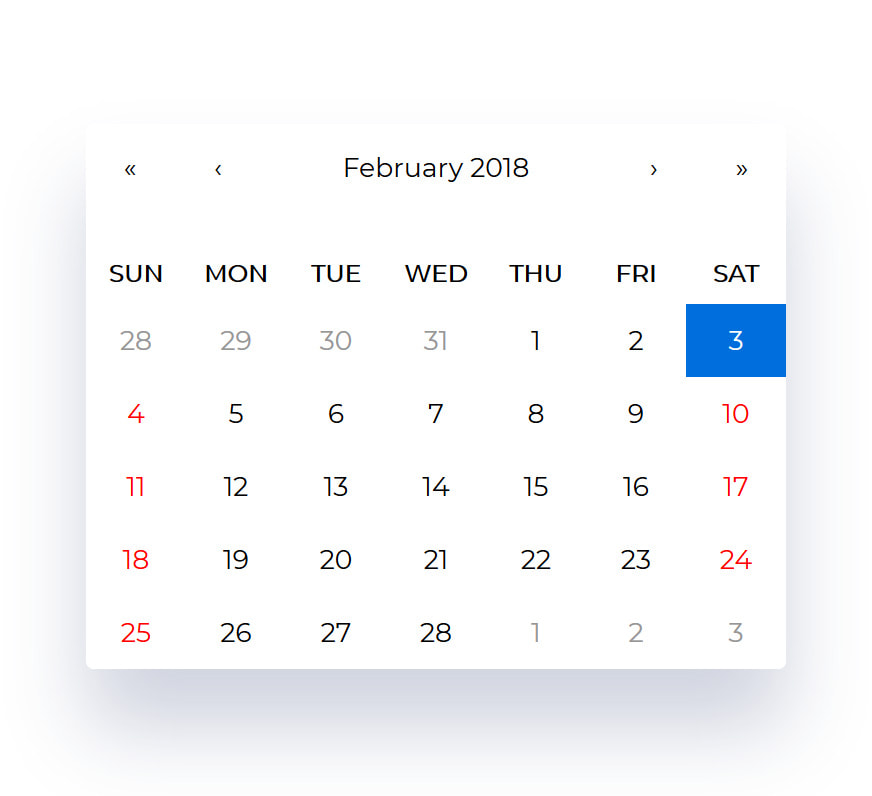
본 게시글에서는 react-calendar 라이브러리로 react 앱에 달력을 적용하는 방법을 공유하고자 합니다.
React-calendar 라이브러리
React-calendar 라이브러리에 대한 설명입니다:
- 깃헙 주소: GitHub - wojtekmaj/react-calendar: Ultimate calendar for your React app.
- 온라인 데모: React-Calendar
- 일, 월, 연도를 선택할 수 있으며, 날짜 range로 선택할 수 있습니다.
- 한국어를 포함한 다양한 언어를 지원하고, moment.js 가 필요하지 않습니다.
설치 / 기본 적용 방법
1. yarn 으로 react-calendar를 설치해주세요.
yarn add react-calendar2. 모듈을 import 하고, css를 적용해주세요. useState를 이용해 클릭한 날짜를 표시 할 수 있습니다.
import React, { useState } from 'react'
import Calendar from 'react-calendar'
import 'react-calendar/dist/Calendar.css' // css import

function MyApp() {
  const [value, onChange] = useState(new Date())

  return (
    <div>
      <Calendar onChange={onChange} value={value} />
    </div>
  )
}
3. 현재 클릭한 날짜를 화면에 표시할 수도 있습니다.
return (
  <div>
    <Calendar onChange={onChange} value={value} />
    <div className="text-gray-500 mt-4">{moment(value).format('YYYY년 MM월 DD일')}</div>
  </div>
)
심화 기능 적용
- https://github.com/wojtekmaj/react-calendar#props 를 참고해서 원하는 props를 커스텀 할 수 있습니다.
- 상단 바 레이블, 클릭 이벤트 핸들러, 날짜 range 설정, 언어 설정, 시작 날짜 설정, 날짜 포맷 설정 등 도큐 참고해서 원하는 기능 추가해주시면 됩니다.
- css 클래스를 잡아서 레이아웃도 변경할 수 있습니다. (예:
.react-calendar,.react-calendar__navigation button.react-calendar__tile--now클래스 등 ) - react-calendar css 커스터마이징 예시: https://blog.logrocket.com/react-calendar-tutorial-build-customize-calendar/
post를 작성한 날짜에 dot 표시를 추가해보겠습니다.
1. 원하는 날짜 api로 가져오기
react-query를 이용해 post를 작성한 날짜를 array 형태로 가져오도록 했습니다. 그리고 useState를 이용해 가져온 배열을 mark 라는 변수에 저장했습니다.
const [mark, setMark] = useState([])

const { data } = useQuery(
  ['logDate', month],
  async () => {
    const result = await axios.get(`/api/healthLogs?health_log_type=DIET`)
    return result.data
  },
  {
    onSuccess: (data: any) => {
      setMark(data)
      // ["2022-02-02", "2022-02-02", "2022-02-10"] 형태로 가져옴
    },
  },
)
2. mark 배열에 해당 날짜가 존재한다면, <div class="dot"></div> html 를 추가하도록 적용했습니다.
<Calendar
  onChange={onChange}
  formatDay={(locale, date) => moment(date).format('DD')}
  value={value}
  className="mx-auto w-full text-sm border-b"
  tileContent={({ date, view }) => {
    if (mark.find(x => x === moment(date).format('YYYY-MM-DD'))) {
      return (
        <>
          <div className="flex justify-center items-center absoluteDiv">
            <div className="dot"></div>
          </div>
        </>
      )
    }
  }}
/>
개발자 도구로 확인해보면 아래와 같이 div가 추가됩니다.

<button class="react-calendar__tile">
  <abbr>날짜</abbr>
  <!--tileContent로 추가되는 위치 시작-->
  <div class="flex ...">
    <div class="dot"></div>
  </div>
  <!--tileContent로 추가되는 위치 끝-->
</button>
3. dot class에 css 추가
.dot {
  height: 8px;
  width: 8px;
  background-color: #f87171;
  border-radius: 50%;
  display: flex;
  margin-left: 1px;
}
.dot 클래스가 추가된 화면 예시 입니다.

4. (참고) Calendar 컴포넌트의 전체 코드는 아래와 같습니다.
<Calendar
  onChange={onChange} // useState로 포커스 변경 시 현재 날짜 받아오기
  formatDay={(locale, date) => moment(date).format('DD')} // 날'일' 제외하고 숫자만 보이도록 설정
  value={value}
  minDetail="month" // 상단 네비게이션에서 '월' 단위만 보이게 설정
  maxDetail="month" // 상단 네비게이션에서 '월' 단위만 보이게 설정
  navigationLabel={null}
  showNeighboringMonth={false} //  이전, 이후 달의 날짜는 보이지 않도록 설정
  className="mx-auto w-full text-sm border-b"
  tileContent={({ date, view }) => {
    // 날짜 타일에 컨텐츠 추가하기 (html 태그)
    // 추가할 html 태그를 변수 초기화
    let html = []
    // 현재 날짜가 post 작성한 날짜 배열(mark)에 있다면, dot div 추가
    if (mark.find(x => x === moment(date).format('YYYY-MM-DD'))) {
      html.push(<div className="dot"></div>)
    }
    // 다른 조건을 주어서 html.push 에 추가적인 html 태그를 적용할 수 있음.
    return (
      <>
        <div className="flex justify-center items-center absoluteDiv">{html}</div>
      </>
    )
  }}
/>